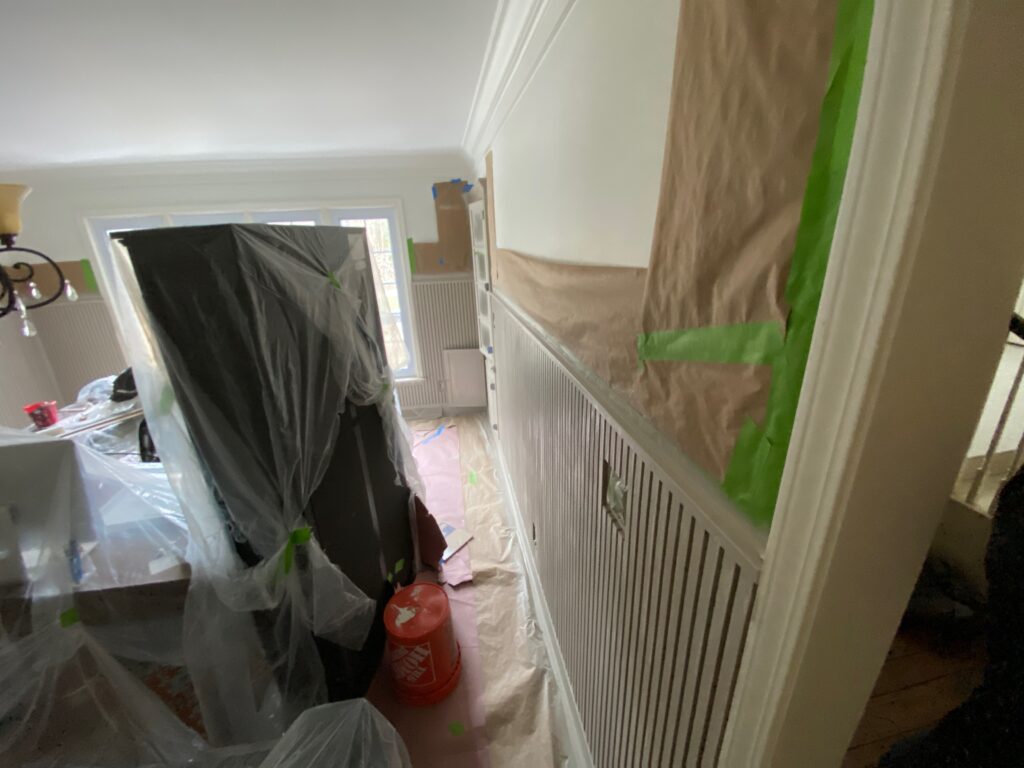
Here is a little look at the room when the house was purchased. It is directly off the kitchen and foyer, so naturally it would be a dining room, right? However, another much bigger room sat off the kitchen adjacent to this room and the owner of this home wanted a large grand dining room space – this room wasn’t going to cut it. So the once living room became a grand dining room and that left us with the question of what to do with this room?
So we thought… sitting room.
Honestly, everyone has declared that sitting rooms are out. I don’t know if I agree. I mean, can you picture being in a beautiful room with lovely sofas, chairs, and chaises. Maybe a drink in your hand, a couple of your favorite people and no television to distract? honestly, in this day and age that sounds lovely.
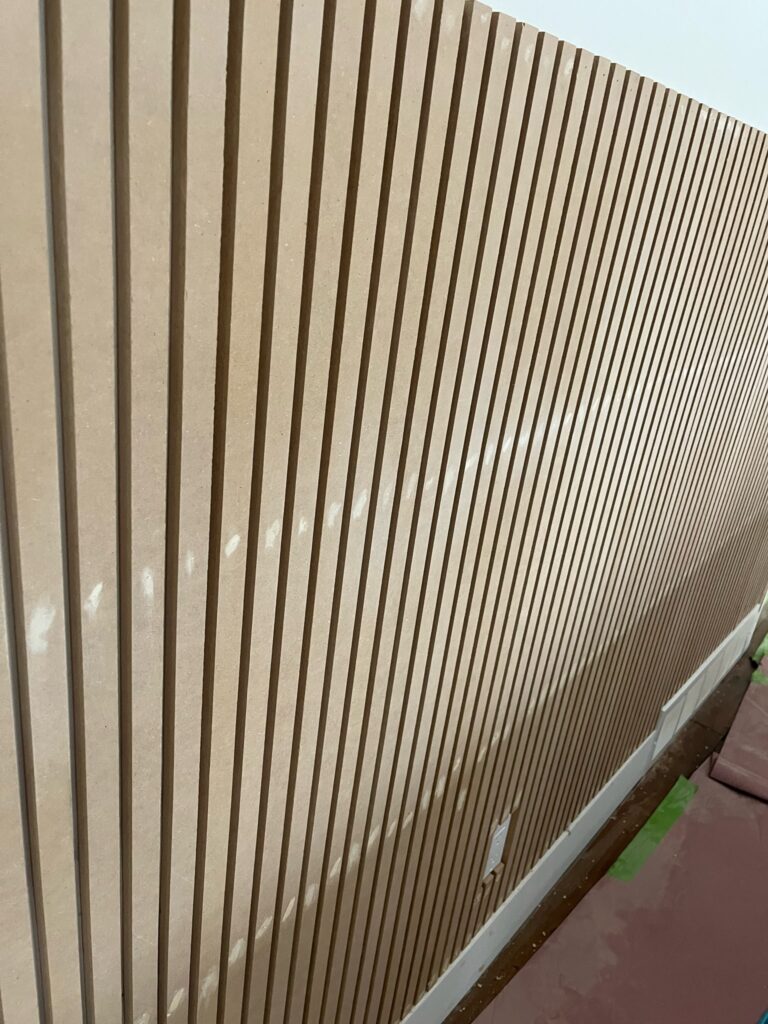
I have seen a few rooms doing these accent walls with pole wrap or some fluted design, which I love. But, we wanted the whole room to feel completed and intentionally designed. So we decided to cover each wall with a a “fluted” style design that went up about 2/3 of the wall. However, we wanted to be mindful of money, so we were going to DIY the fluted look with cut down MDF. Though you can already buy a fluted look, it does cost a bit more. So if you have a table saw that can rip down these strips, why not?
Each strip is 1″ wide, 1/2″ deep, and 48″ tall.
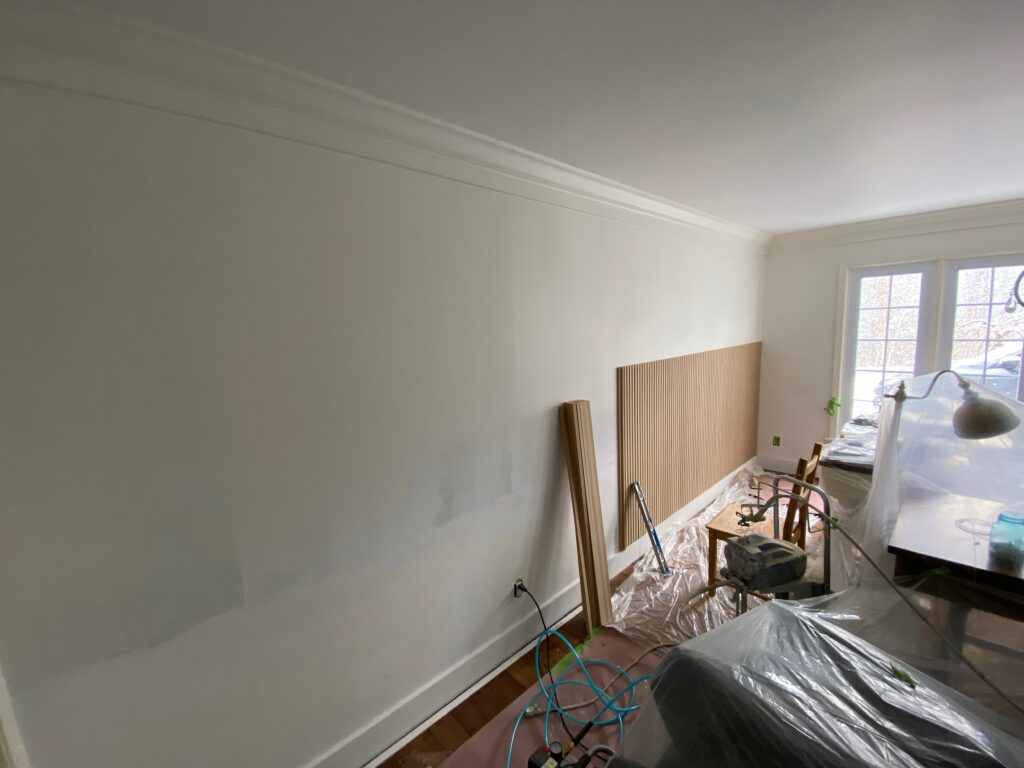
Forgive my lack of pictures, but our first step was to remove the old wainscoting, patch, prime, and paint. The top wall and crown molding were painted the beautiful and popular Alabaster by Sherwin Williams. We then went with a 6″ wide trim piece on the bottom with a small 1/2″ flat piece of toe molding to give the trim a little more character.
Then, we are off. Using a level and a 1/4″ block (cut from the leftover MDF) to separate each piece we began the tedious process of running this look around the entire room. Now, in the picture you can see we did not bother to paint the bottom half of the room Alabaster because we knew we would be going with a different color.
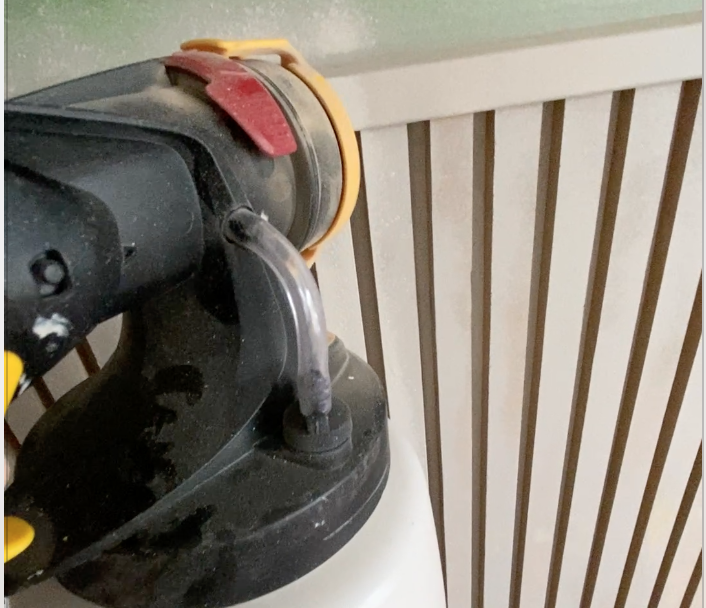
To attach the pieces we used wood glue and a compressor with an 18″ brad nailer. We found this one off Amazon worked perfectly well for the project!
We tried to keep the nail holes consistent throughout the process so that when we filled it with wood filler we could then run the sander evenly across the wall. As quick and easy as possible! we also decided to keep the outlets and light switches recessed. I have seen people bring them out and kind of frame around them, but we did not want to do that.
Another apology for a lack of picture for the top piece. I really didnt want a big ledge and wanted this to look as seamless as possible, SO we bought wood corner molding. You can find the exact piece used here. We then had to run it through the table saw to get rid of one of the rounded edges so that it fit tight against the wall.
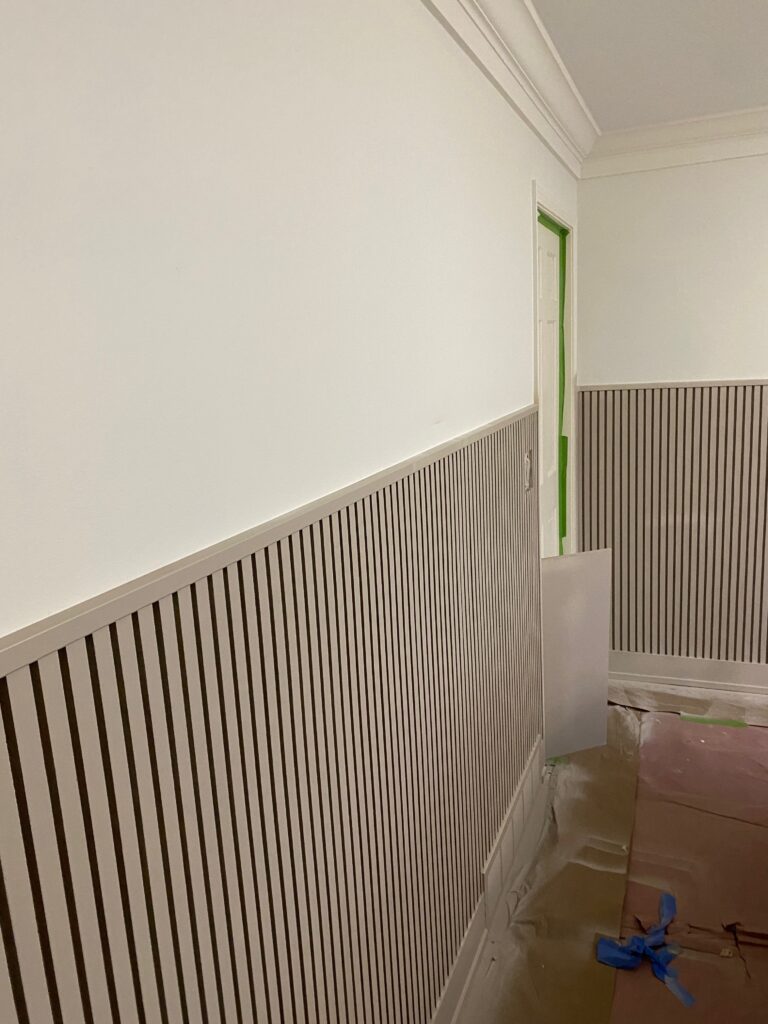
Once that top moulding was in place it was time to prime and paint. This part we knew we would need to go slow and purposeful so that we could get all the inbetweens and edges.
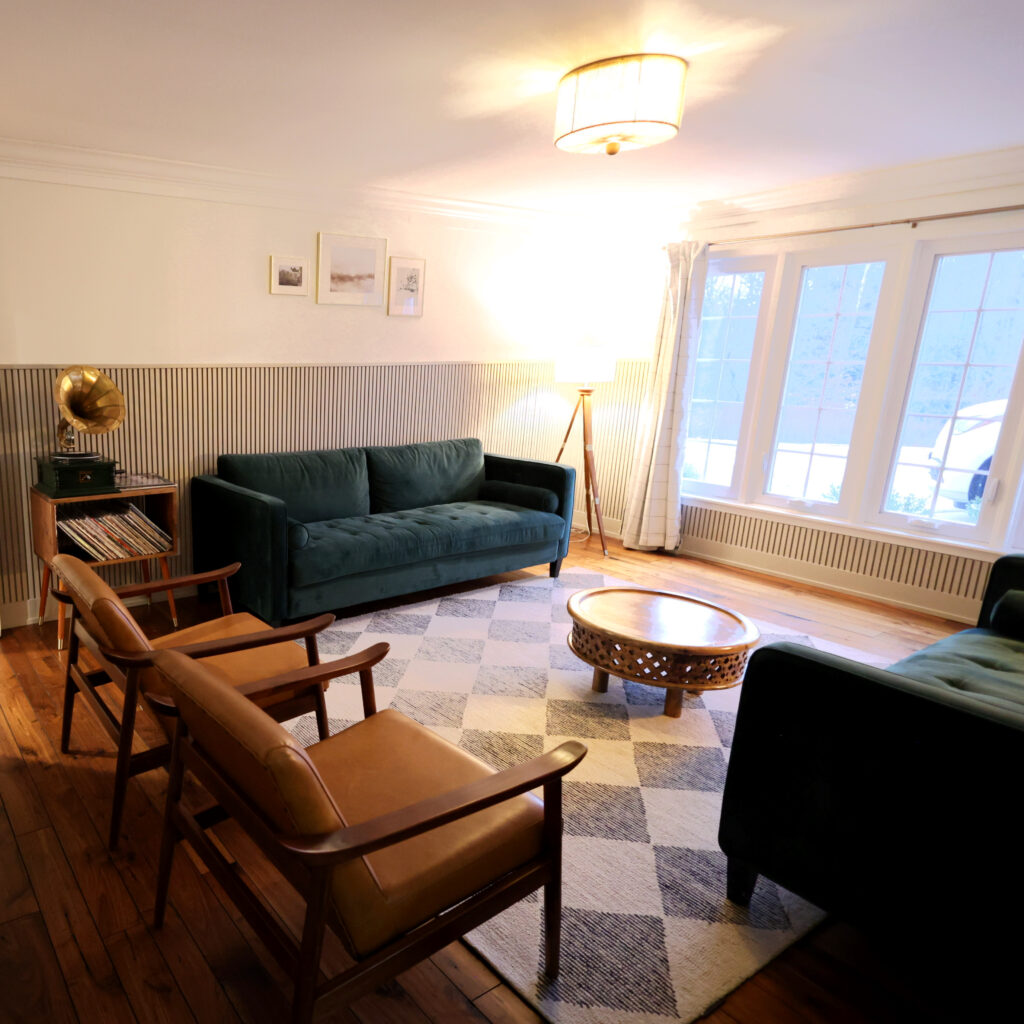
And a couple coats later we have a nearly finished room! The color is Stone Hearth by Benjamin Moore and gives the room a moody edges without making it too dark. Honestly this is one of those rooms that we could have gone with many different colors and it would have been amazing. However, we knew the furniture coming in was green so decided to keep the walls on the neutral side. But if your furniture is neutral, I think the wall would amazing in a light blue or a green… even a pink.
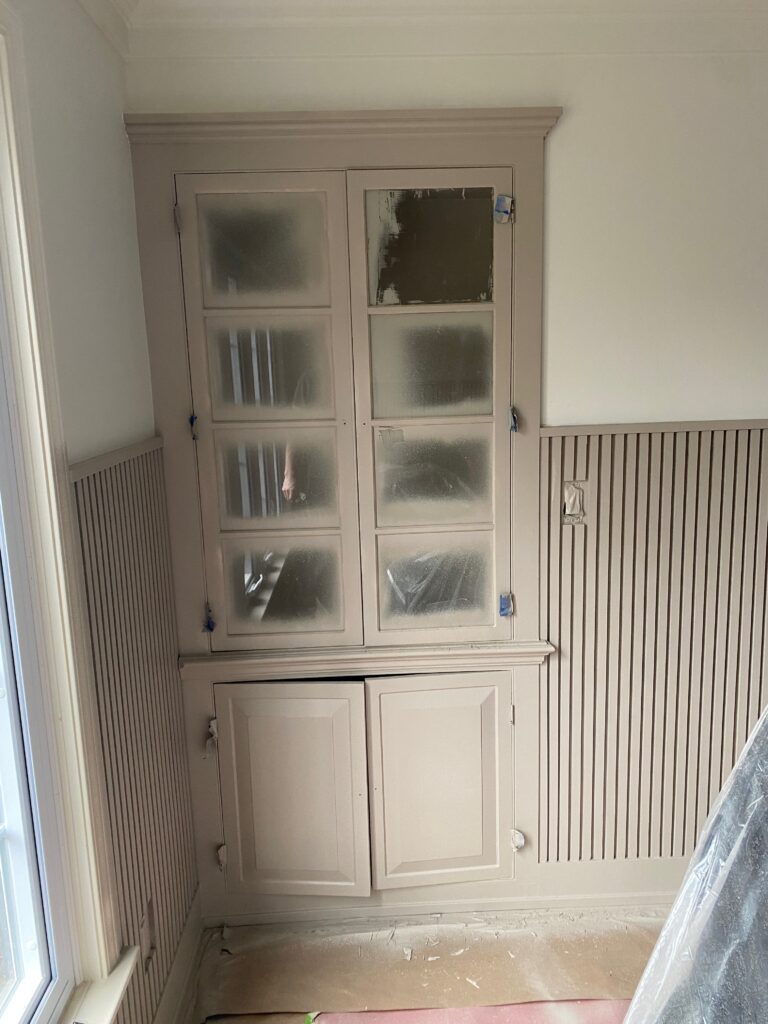
We also debated painting this entire built-in cabinet, ended up going for it and are sooooo happy with how it turned out. it looks seamless and is beautiful. We added some brass hardware to the doors and the built-in is almost the star of the show!
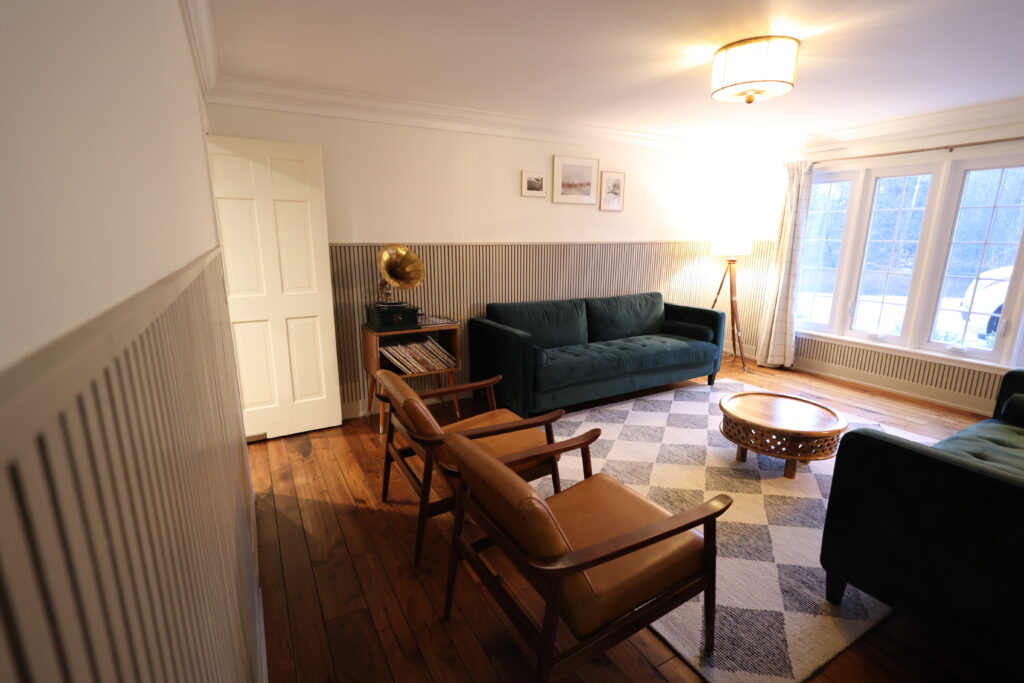
So, here is the final look. We love how the walls look. I don’t know why, but my favorite part might be the fluted wood beneath the window. I seriously love it.
It’s always interesting to design a room around furniture that has already been bought. But I think the room is simple but elegant.
If you like some of the finishes such as the lighting, rug, or chairs I have them linked. The green sofas are vintage so sadly I don’t have a link for those. And of course I wouldn’t exclude the old fashion record player.
All in all we love how the room turned out and could not be happier. If you would love to incorporate a sitting room into your house and have the room I would highly recommend!