
Considering Using the Ikea System With Semihandmade Fronts? You've Come to the Right Place.
This is my second kitchen remodel where we used IKEA bases with Semihandmade fronts. Honestly, we LOVE both IKEA and Semihandmade and they did not disappoint. We have used IKEA cabinets at least half a dozen times before, but we weren’t introduced to Semihandmade until a few years ago. For the price, the quality was way better then we anticipated.
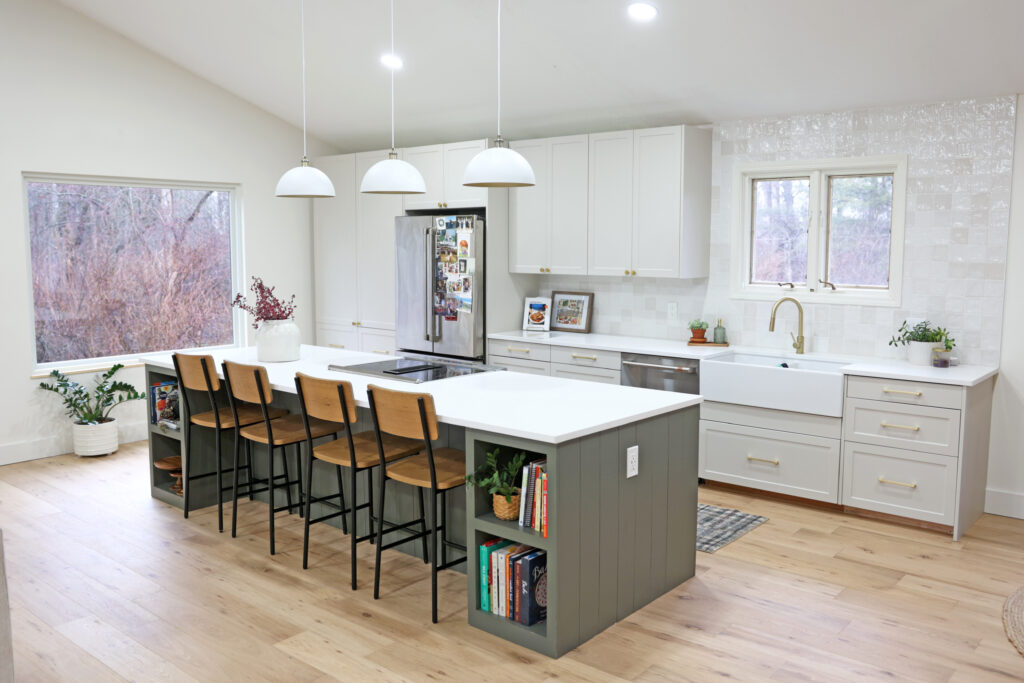
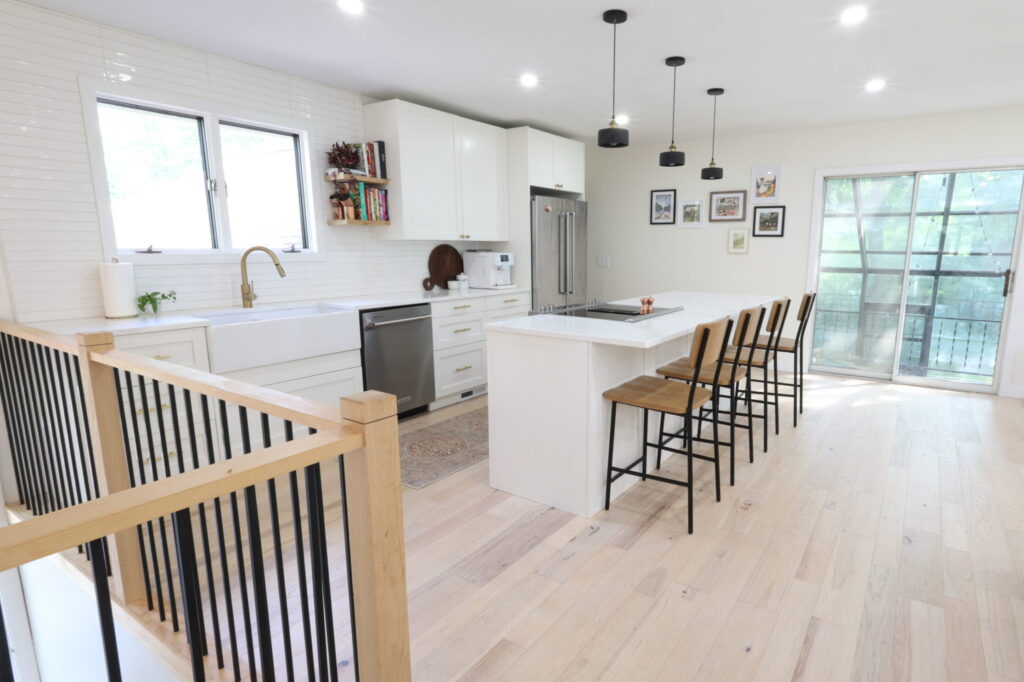
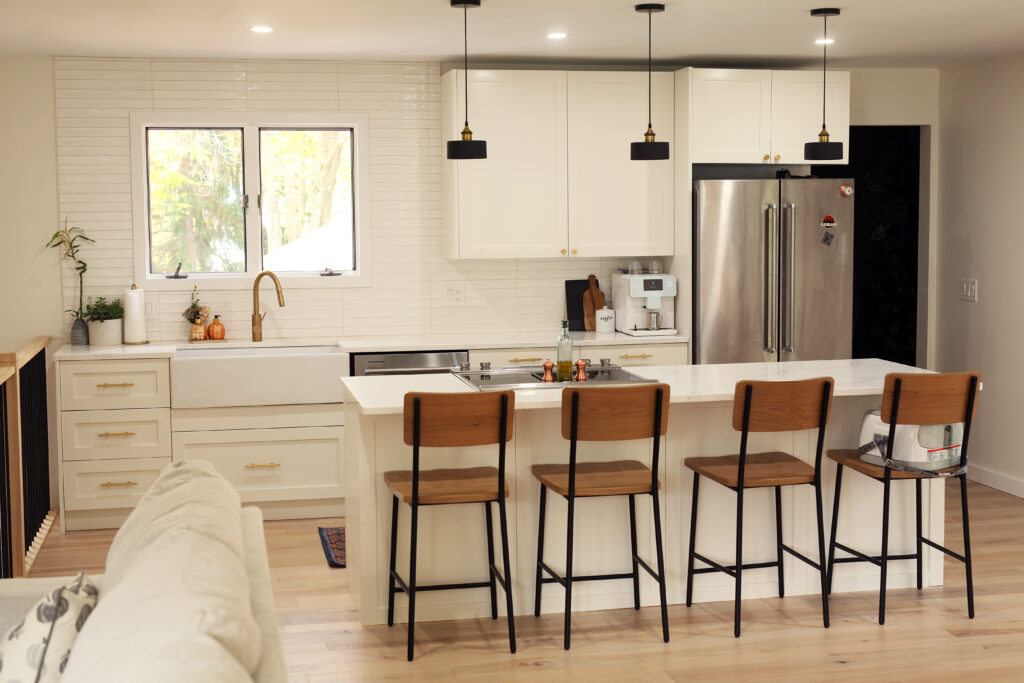
Look at how beautiful this kitchen came out! The transformation is unreal.
If you are new to IKEA, you may not know that they have a designing tool on their website to help you put your kitchen together – so you can do it all yourself. This is what initially drew me to IKEA. We wanted to have an updated space without paying a designer dime or for custom cabinets, which will triple the price of your new kitchen. However, if you feel like you just don’t have the eye or the whole process overwhelms you, IKEA offers designer services. We have gone into the store multiple times and gone over our kitchen with their design experts. It was completely free.
Once you have your design, you create your cart at Semihandmade. You can either create it yourself using your IKEA design, or you can have their experts do it for you for $99. All this basically means is that they are going to take the design and figure out how many doors and drawers you need plus sizes, then when they have it figured out they will fill your cart with exactly what you need.
Honestly, doing it yourself is pretty easy and if you have the time you can save $99. However, if you want to save time and have piece of mind that nothing is missed, have an expert make your cart for you! Either way its super simple.
Semihandmade has many different drawers and door designs. We have always done the shaker, but I am tempted to do some of their other designs, which look beautiful! You can see all the designs they offer on their website. They ever have specially designed fronts from ChrisLovesJulia that give almost a mid-century modern vibe.
Seriously, if you are considering Semihandmade, explore their options. If you like one of the designs but you don’t see a color that excites you, have no fear they have a solution for that as well. One we have taken advantage of both times we used them.

When we went to Semihandmade and found that you can order their cabinet fronts, but have them come in unfinished we jumped on the opportunity. First, we would save money and second we would get to choose whatever color we wanted.
So we promptly bought the DIY shaker and painted them. As you can see from the picture above, we chose a slightly off white color called Swiss Coffee by Benjamin Moore. It came out beautiful.
The next kitchen we sed Semihandmade we knew we wanted a green island because a lot of the elements in the house were green. However, we were more willing to use a pre-painted cabinet for the wall cabinets to save us time and energy. In the picture on the right you can see our paint station set up. This is after only one coat of Dark Olive by Benjamin Moore. We ended up spraying a couple more coats just to make sure it coated well.
Then we received the wall cabinets pre-painted from Semihandmade and let me tell you we were so happy with them. My husband promptly told me we were not buying the DIY again. The quality of their paint was much better then what we did ourselves. Not only that, but the interior panel of the shaker was better protected, smoother, and much easier to clean. We absolutely loved the quality and would highly recommend getting them in an offered color from Semihandmade. Even though it cost extra it is worth it.
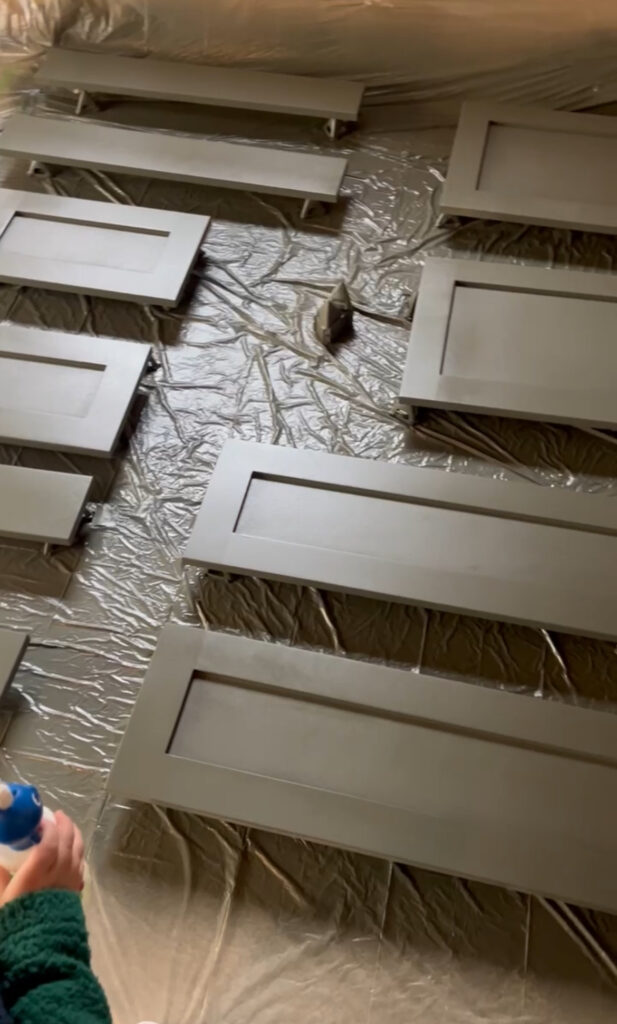

Another note about the DIY cabinet versus the pre-painted cabinet. If you choose the DIY cabinet please be aware that you will probably want to caulk the interior corners of the shaker door and drawer fronts. With our first kitchen we made the mistake of just painting and hanging. To our dismay when we started using the kitchen we found that small food particles that fell from the counter would get stuck in those front crevices and were nearly impossible to get out. If you do not caulk those interior corners and edges you will probably find the same problem happening to you. While it was nice to save the money and choose the color ourselves, it was almost more of a headache to have to deal with the constant nit-pick cleaning of those little crevices. Just a heads up that DIY doesn’t mean just painting. The ore-painted cabinets did not have this problem at all.
All in all noth of these kitchens came out beautifully. If you have a DIY bone in you, this will be a great project to take on. If you aren’t a DIYer you can learn along the way with the help of both the IKEA designer and the Semihandmade designer.
If you are interested in seeing the process of either of there kitchen renovations, have no fear we will be detailing both renovations and where we got all the finishes soon!